
Wayfinding
Wayfinding
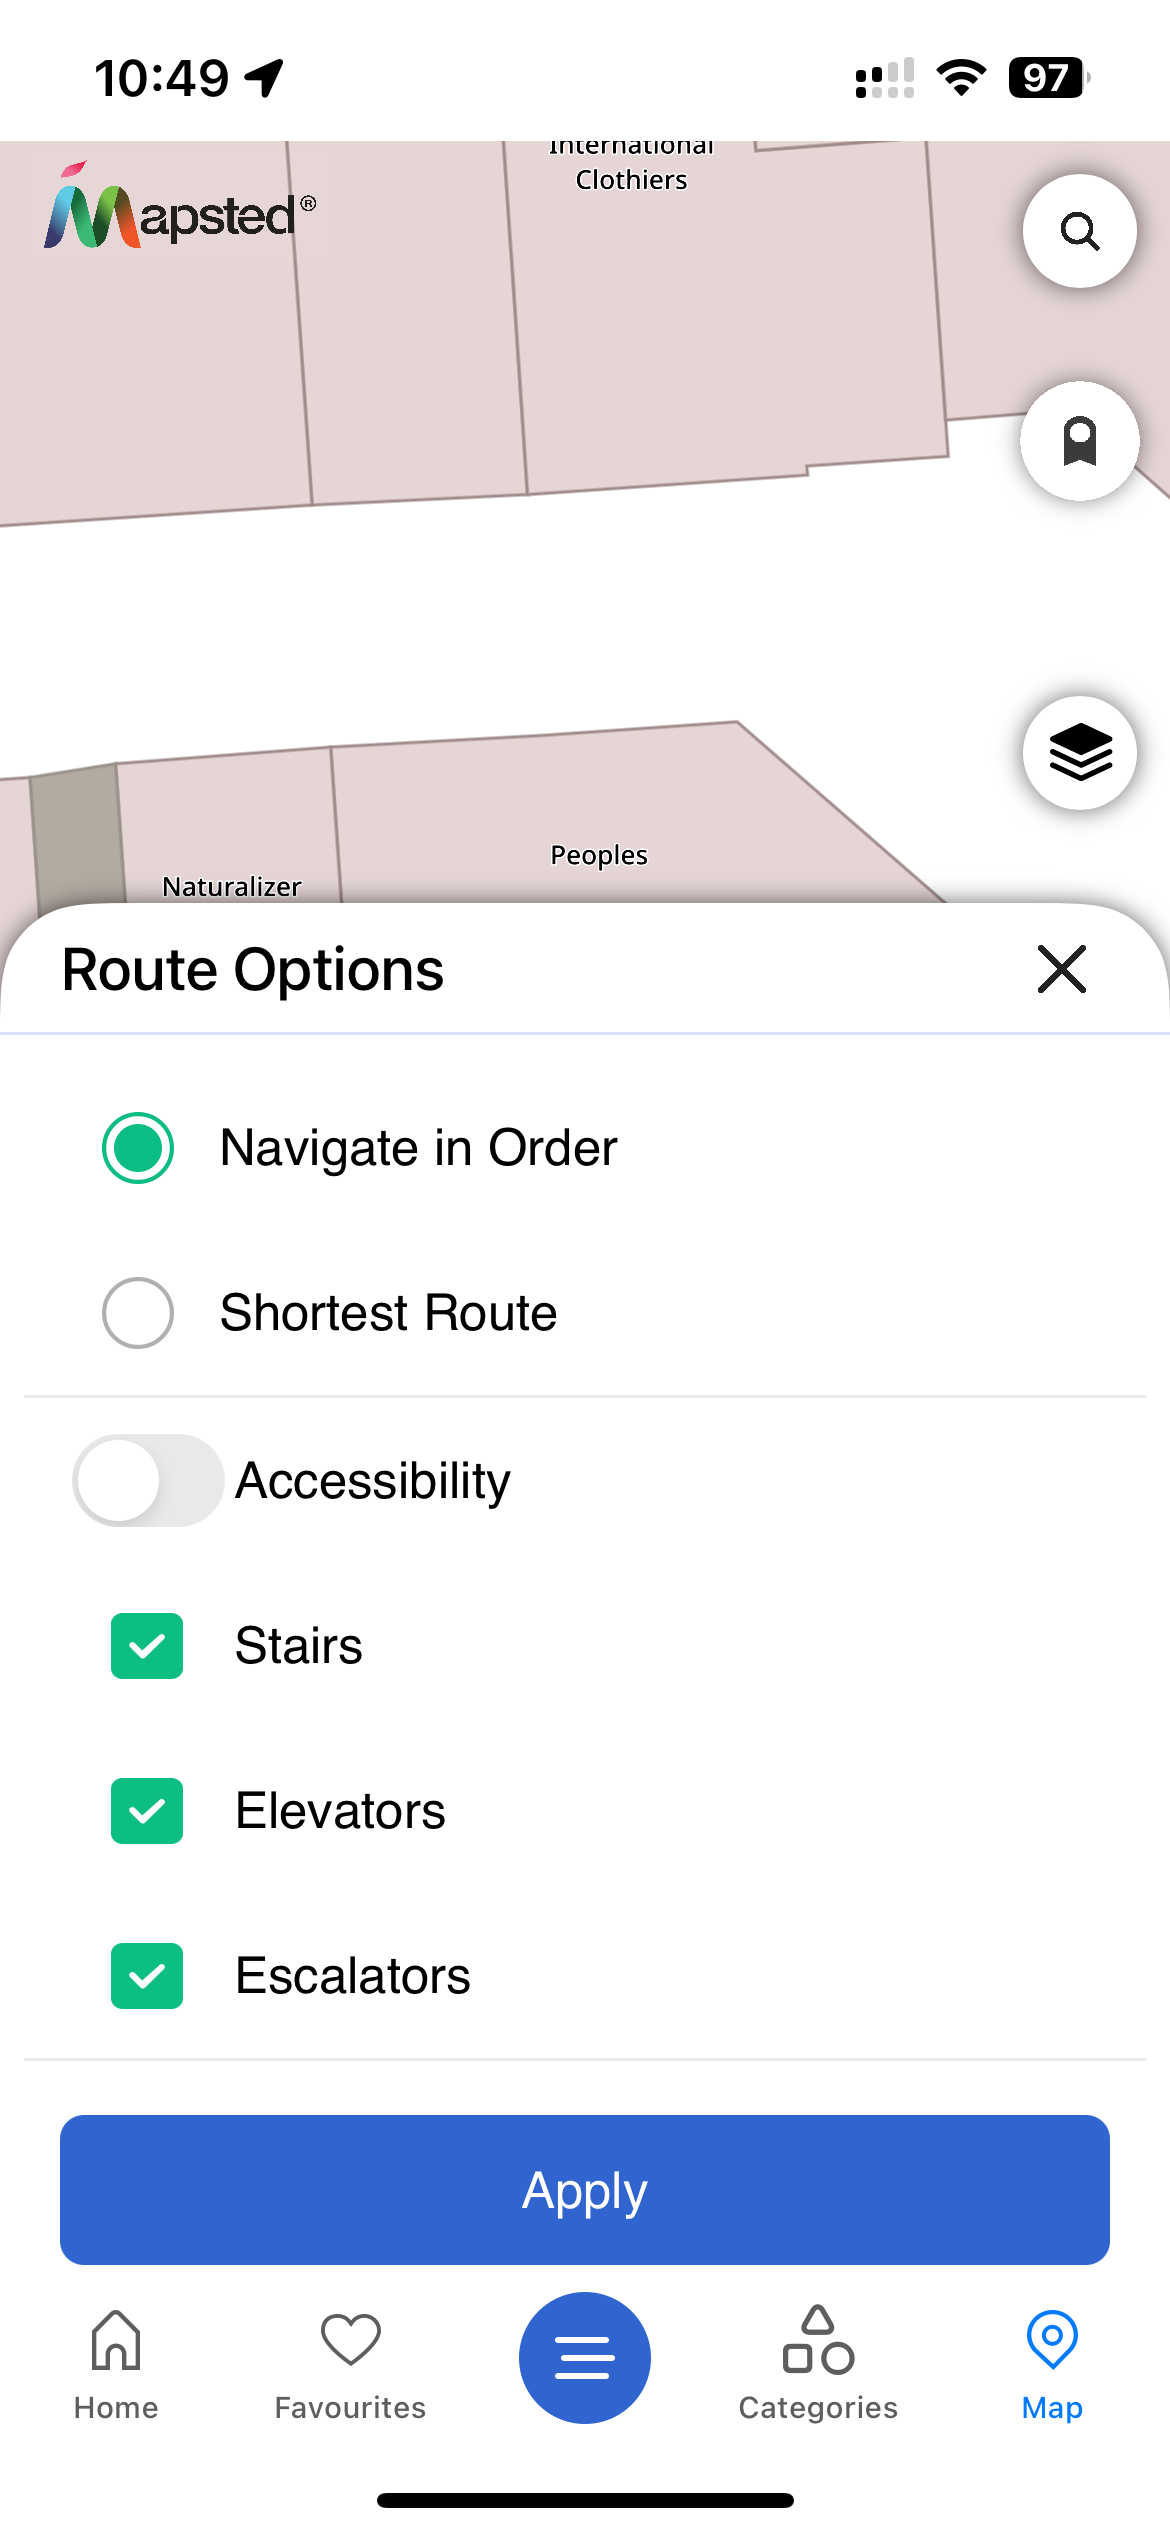
Wayfinding uses Mapsted's advanced routing technology to generate optimal routes to help users get around in selected properties and buildings. Users can optimize accessible routes by customizing navigation preferences to accommodate mobility needs, such as avoiding stairs and prioritizing elevators or escalators for a more inclusive travel experience. Additionally, they can plan routes with multiple stops, ensuring seamless and efficient navigation. The wayfinding engine can handle property-wide multi-destination routing. Each RouteRequest consists of a start location, such as the user's current location or a point of interest, and a list of destination locations or points of interest. The RouteRequest also consists of a set of routing options that determine which accessibility measures are necessary, the order the user would like to navigate to the destinations in, and allow for the use of optimized routes.
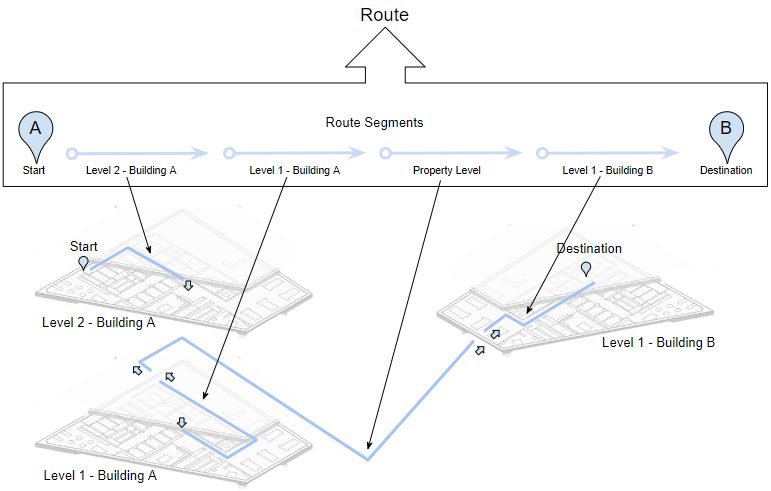
The RouteResponse consists of a list of Route objects, where each Route consists of a list of route segments. Each segment corresponds to a portion of the route on a specific floor of a building, or property level, for example outdoors, and is linked via a transition type. A figure showing an illustrative example of a RouteResponse is shown below. In the illustrative example above, the user is navigating from a location on Level 2 of Building A to a location on Level 1 of Building B. As shown, the route from point A to point B involves four route segments and includes three transitions - between floors, to outdoors, and to indoors.
New in v26.7.1 (iOS)
- Route-preview enhancements — configurable from/to labels on the route preview, plus a routed-distance request that computes travel distance without drawing a route. See the Route Preview guide.
Prebuilt UI/UX
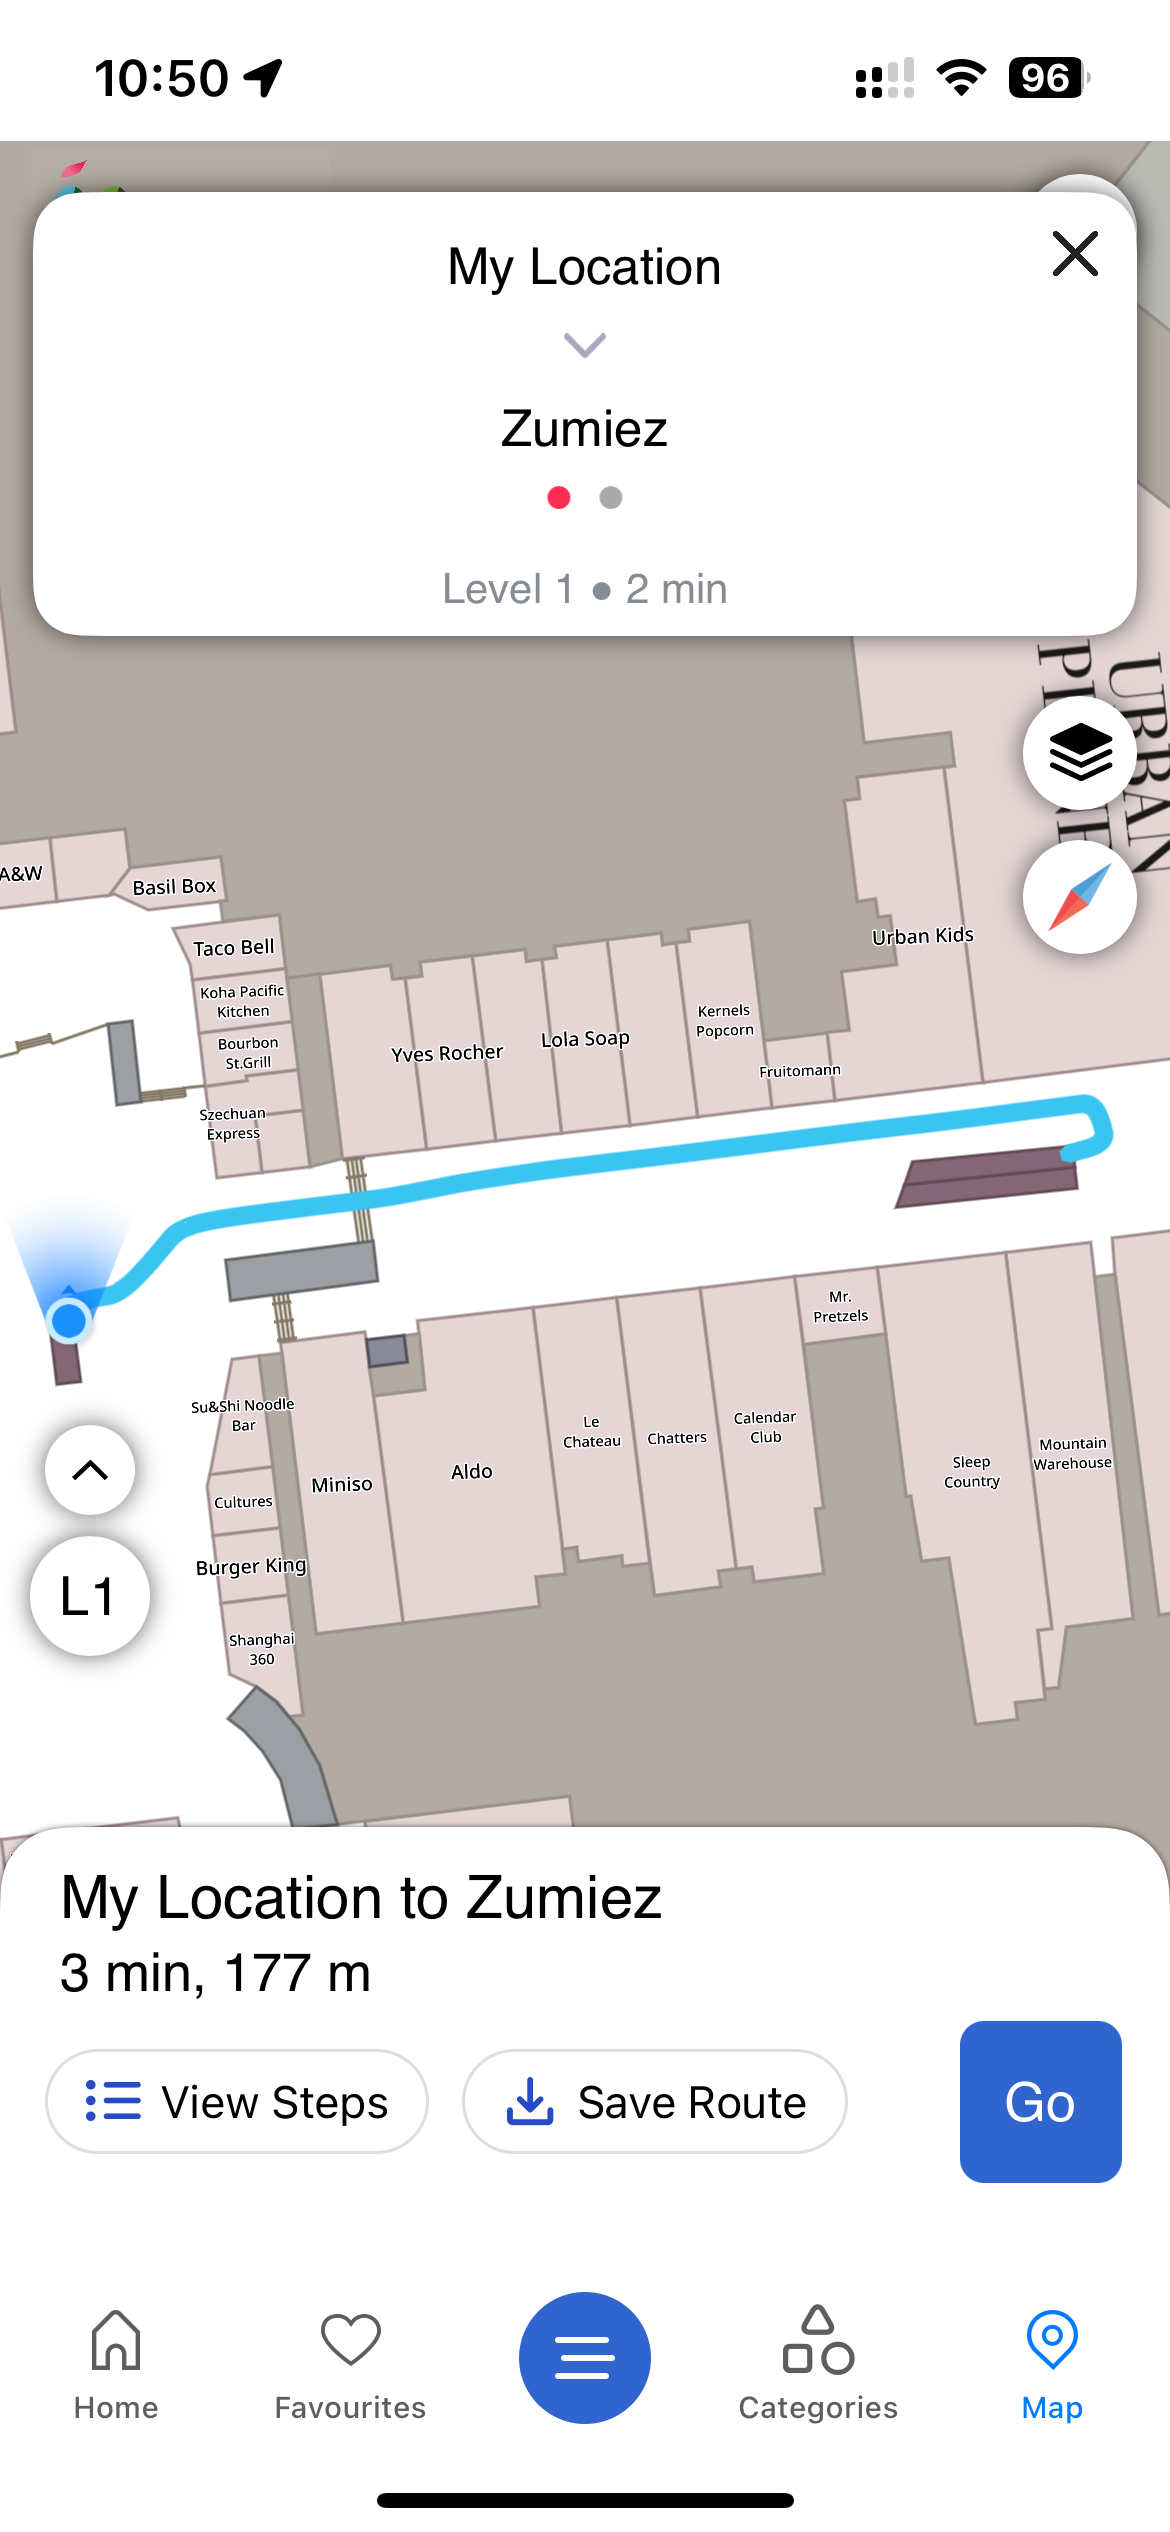
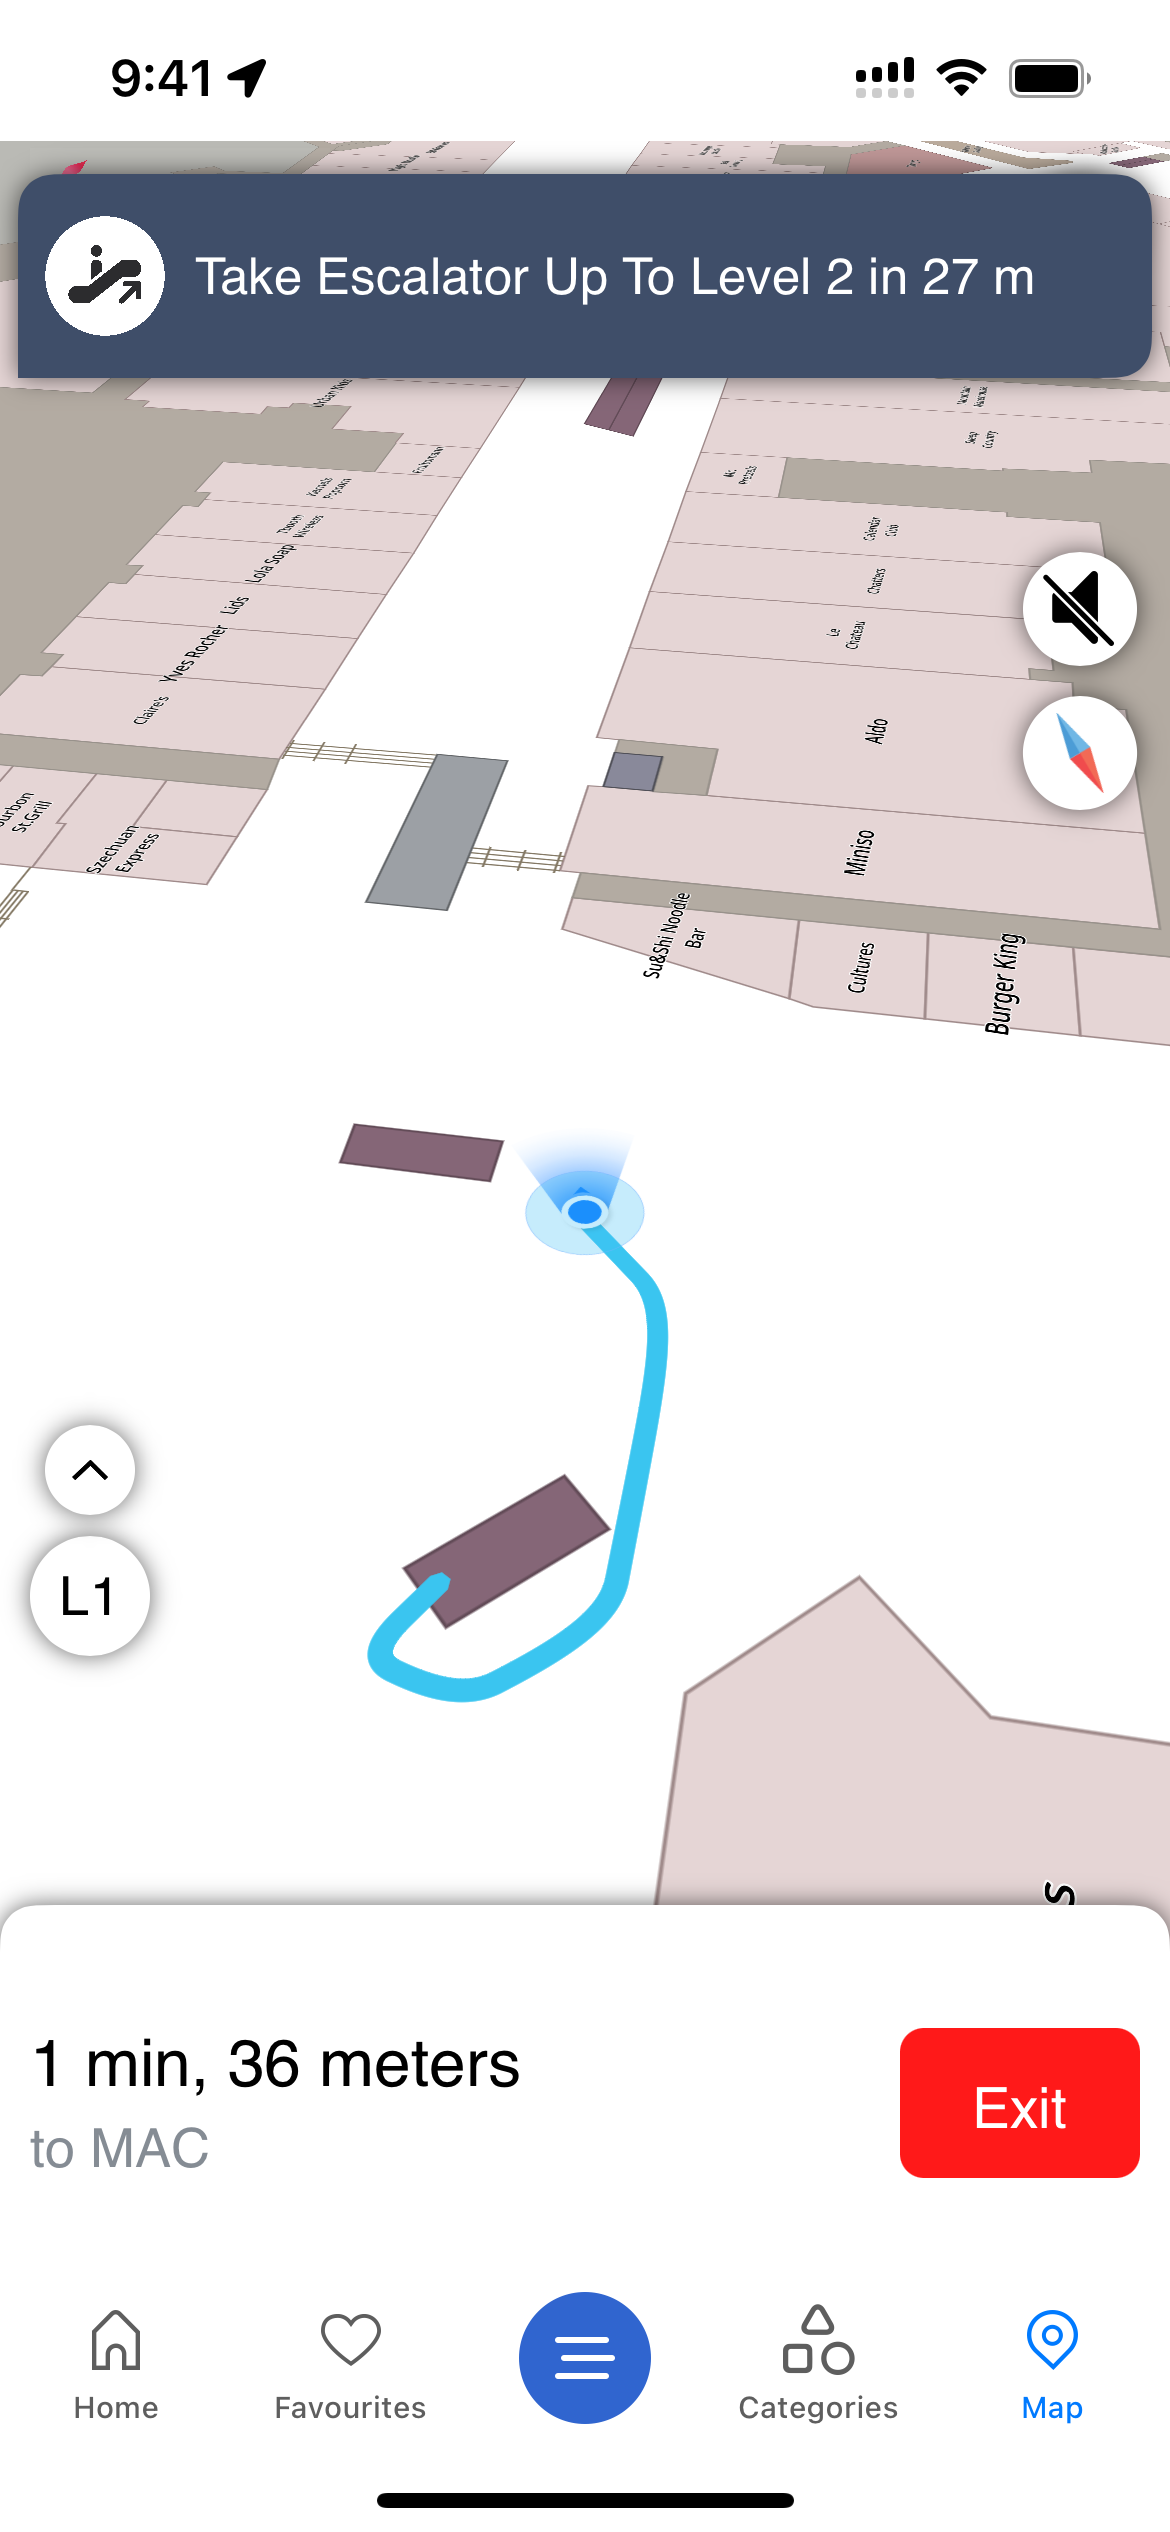
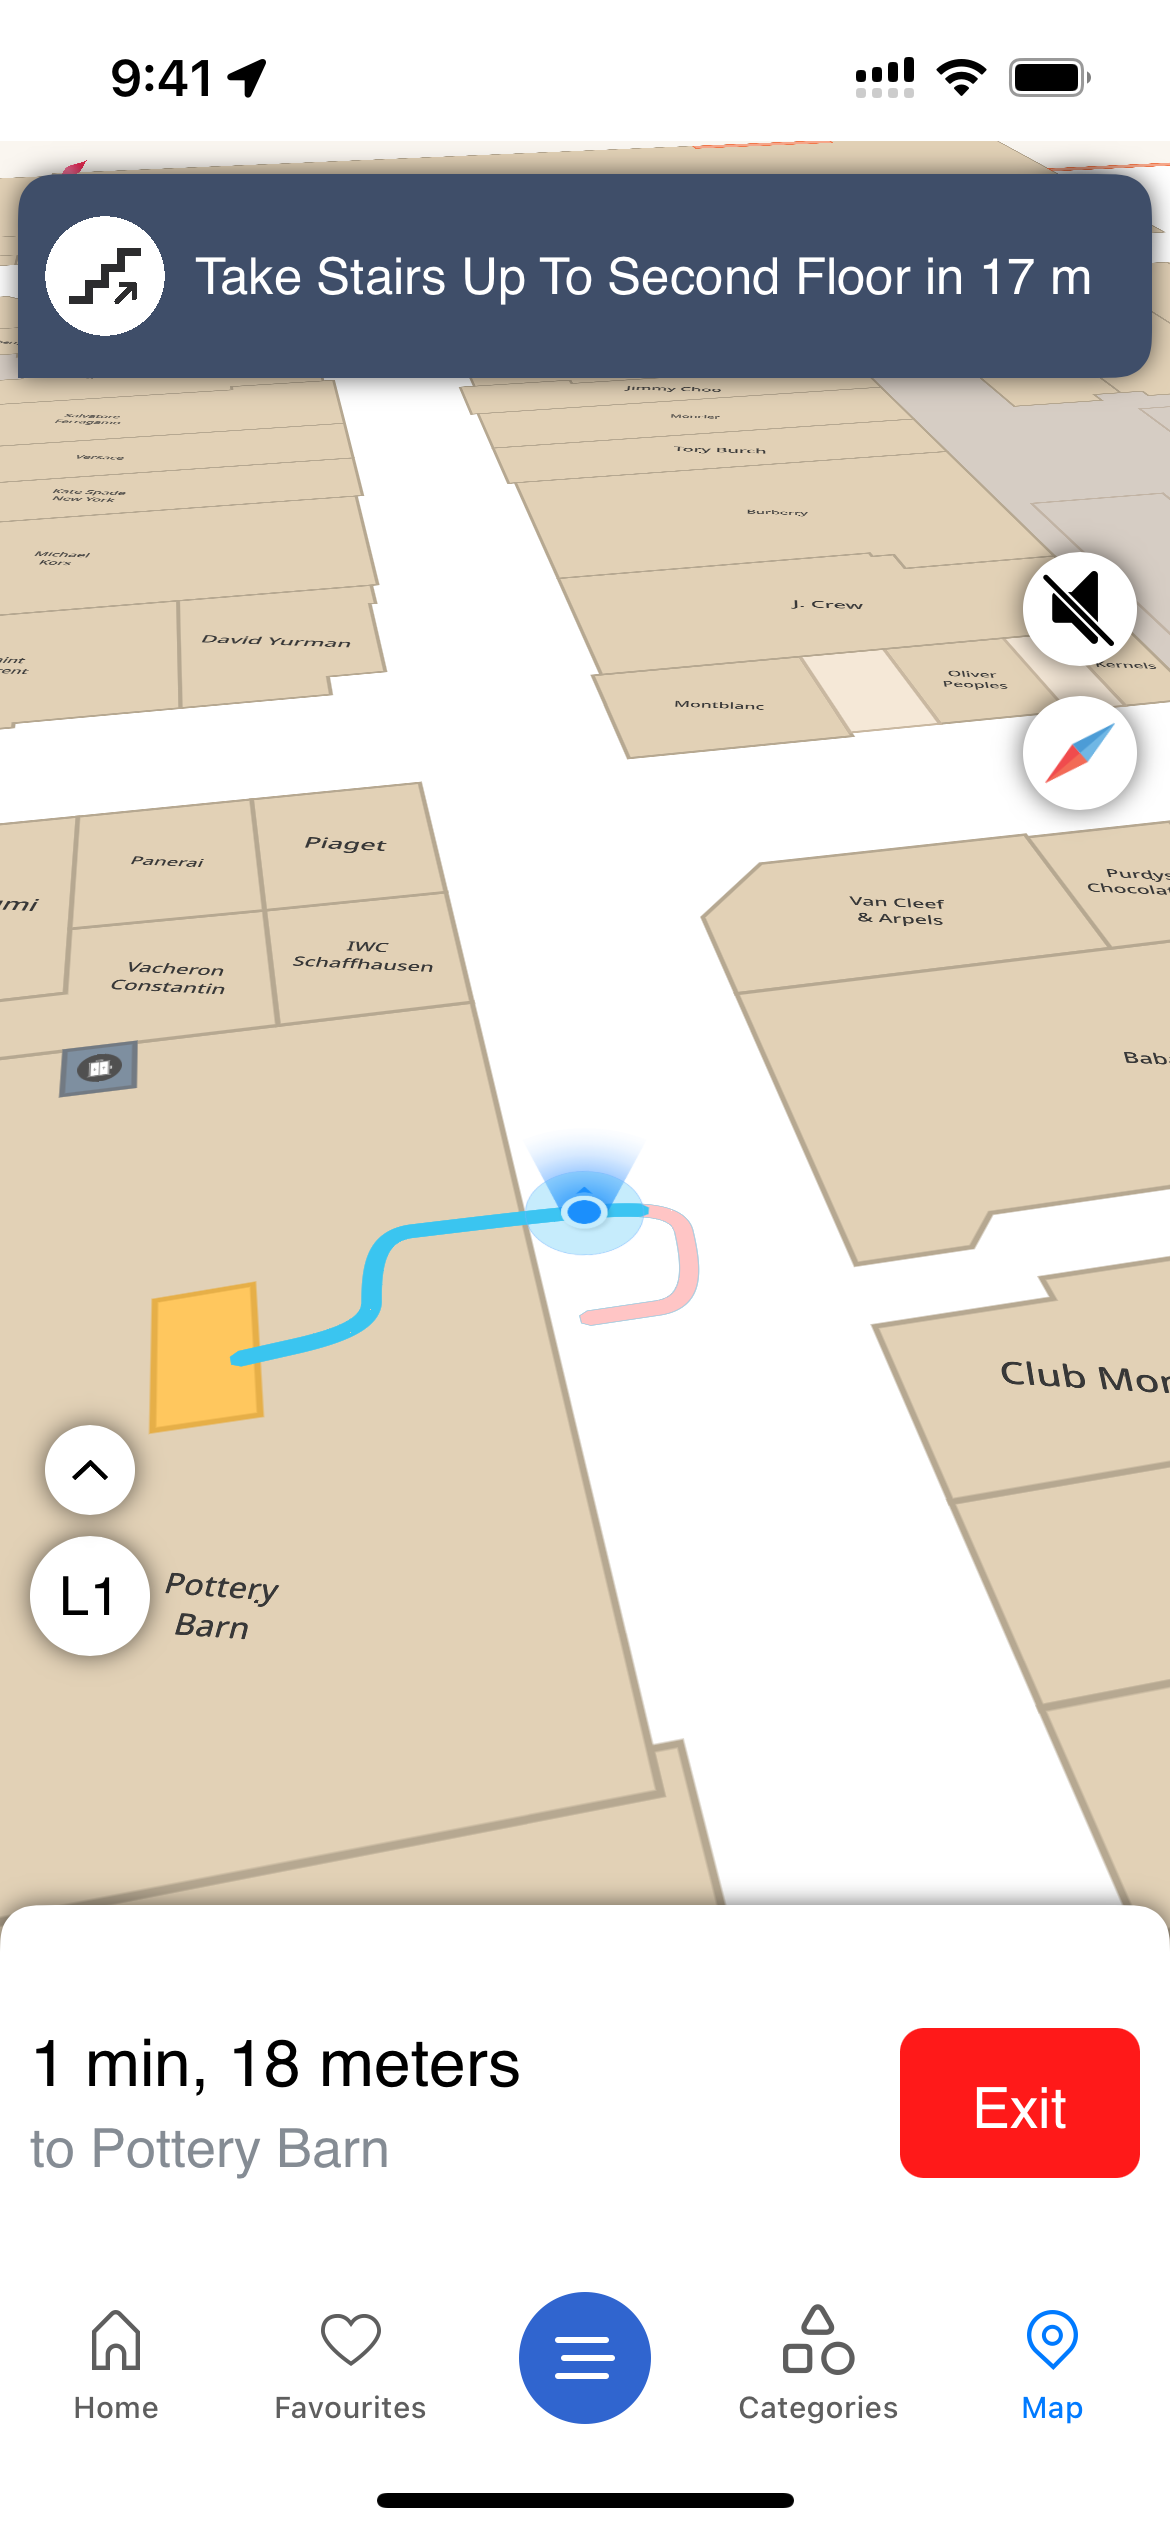
When using the Prebuilt UI/UX, the wayfinding functionality is automatically in use.
Customizable UI/UX
There are a number of customizable routing parameters available, which can be set programmatically, as outlined below.
Programmatic Wayfinding
// Setup desired routing options.
// setItineraryOptimization(true) re-orders destinations optimally; false navigates in order.
// For an accessible route, use RoutingOptions.accessibleInstance(true) (see the Accessibility section).
RoutingOptions routingOptions = new RoutingOptions.Builder()
        .setIncludeStairs(true)
        .setIncludeEscalators(true)
        .setIncludeElevators(true)
        .setItineraryOptimization(true)
        .build();

// Create waypoints using Waypoint.from(ISearchable) or Waypoint.Builder
Waypoint waypoint1 = Waypoint.from(iSearchable1);
Waypoint waypoint2 = new Waypoint.Builder().addLocation(mercatorZone2).build();
Waypoint waypoint3 = Waypoint.from(searchEntity3);

// Build the route request. The propertyId is required.
RouteRequest routeRequest = new RouteRequest.Builder(propertyId)
        .setRoutingOptions(routingOptions)
        .setStartWaypoint(waypoint1)            // only if not from 'MyLocation'
        .addDestinationWaypoint(waypoint2)      // add possibly multiple destinations
        .addDestinationWaypoint(waypoint3)
        .setIsFromCurrentLocation(false)        // true if routing from the user's position
        .build();

// Start the async route request.
// The response is delivered to the RoutingRequestCallback; update the UI accordingly.
coreApi.routing().requestRoute(routeRequest, new RoutingRequestCallback() {
    @Override
    public void onSuccess(RouteResponse routeResponse) {
        // A route was found. To begin turn-by-turn navigation:
        Route route = routeResponse.getRoutes().get(0);
        RoutingConstraints constraints = new RoutingConstraints.Builder().build();

        coreApi.routing().startNavigation(route, RoutePathType.OPTIMAL_ROUTE,
                routingOptions, constraints, new NavigationCallback() {
            @Override
            public void onNavigationInitSuccess(NavigationState navigationState) {
                // Navigation started successfully
            }

            @Override
            public void onNavigationInitFailure(NavigationError navigationError) {
                // Navigation could not be started; inspect navigationError.getErrorType()
            }

            @Override
            public void onRouteSegmentReached(RoutePathSegment currentSegment,
                                              List<RoutePathSegment> visitedSegments,
                                              List<RoutePathSegment> upcomingSegments) {
                // A route segment was reached (e.g., a change of floors or buildings)
            }

            @Override
            public void onRouteInstruction(RoutePointInstruction currentInstruction,
                                           RoutePointInstruction nextInstruction,
                                           RoutePointInstruction afterNextInstruction) {
                // A new instruction is available for the navigating user.
                // e.g., currentInstruction: "Take Elevator to L3"
                //       nextInstruction:    "Then turn left in 5 m"
            }

            @Override
            public void onUserProgressAlongRoute(NavigationState navigationState) {
                // Called as the user progresses along the route; use it to drive the UI
            }

            @Override
            public void onRouteRecalculation(NavigationState navigationState,
                                             Route newRoute, RoutePathType routePathType) {
                // The user deviated from the route and a new route was recalculated
            }

            @Override
            public void onDestinationReached(Waypoint destination) {
                // Reached the destination of this route
            }

            @Override
            public void onNavigationStopped() {
                // Navigation ended (finished or cancelled)
            }
        });

        // Navigation can be cancelled midway (e.g., a user UI interaction) by calling:
        coreApi.routing().stopNavigation();
    }

    @Override
    public void onError(RouteResponse routeResponse) {
        // The route request failed; inspect routeResponse.getRouteError()
        RouteError error = routeResponse.getRouteError();
    }
});
// To make a route request, you should first setup your desired routing options

/*
    - optimizedRoute = false will navigate in order
    - optimizedRoute = true will re-order destinations optimally
*/
let optimizedRoute = true

//Preferred transition options
let useStairs = false
let useEscalators = true
let useElevators = true

let calculateFromCurrentLocation = true

let routeOptions = MNRouteOptions.init(useStairs, escalators: useEscalators, elevators: useElevators, current: calculateFromCurrentLocation, optimized: optimizedRoute)

// There is also an accessibility option provided - it may override the behaviour of Stairs/Elevator/Escalator
routeOptions.setAccessibility(true)

//Build a route request
var routeRequest: MNRouteRequest?

if calculateFromCurrentLocation { //startEntity is passed as nil
    routeRequest = MNRouteRequest.init(routeOptions: routeOptions, destinations: destinations, startEntity: nil)
}
else { //destinationsMinusStart is an array of destinations excluding the start
    routeRequest = MNRouteRequest.init(routeOptions: routeOptions, destinations: destinationsMinusStart, startEntity: startEntity)
}

if let routeRequest = routeRequest {
    CoreApi.RoutingManager.requestRoute(request: routeRequest, routingRequestCallback: self)
}

var routes : [MNRoute] = []

// To receive the callback after you make the route request, you will need to have implemented the RoutingRequestCallback protocol
extension YourViewController: RoutingRequestCallback {
    func onSuccess(routeResponse: MNRouteResponse) {
        //You can proceed to request using one of the routes returned with routeResponse
        //Check for error
        if routeResponse.errorType == .noError {
            routes = routeResponse.routes
        }
    }

    func onError(errorCode: Int, errorMessage: String, alertIds: [String]) {

    }
}

//Make sure routes are not empty, and choose a route from the list
guard let route = routes.first else {
    return
}

//Your can now make a route request with the route. In order to receive route status updates, you also pass a delegate to protocol RouteStatusCallback.
CoreApi.RoutingManager.startNavigation(route: route, routingStatusCallback: self)

//Your delegate will need to be implement the methods of *RoutingStatusCallback*.
extension YourViewController: RoutingStatusCallback {

    func onRoutingStatus(isRoutingModeOn: Bool, latestRouteResponse: MNRouteResponse) {
        // Indicates a status change for the latest route response
        // For example, if isRoutingModeOn is false, UI can adjust accordingly
    }

    func onRouteInstructionReceived(routeNode: MNRouteNode, nextRouteNode: MNRouteNode?) {
        // Called when a new instruction is available for the real-time navigating user
    }

    func onRouteSegmentReached(currentRouteSegment: MNRouteSegment,
                           visitedRouteSegments: [MNRouteSegment],
                           upcomingRouteSegments: [MNRouteSegment]) {
        //Called when a route segment has been reached.
    }

    func onUserProgressAlongRoute(routeUserProgress: MNRouteUserProgress) {
        //This function will be called as user continues progress along route
    }

    func onRouteRecalculation(newRouteResponse: MNRouteResponse) {
        // Called when the user deviates from the route provided
        // and a new route is automatically recalculated
    }

    func onDestinationReached(waypoint: MapstedCore.MapstedWaypoint) {
        // Called when the user reaches the destination (specified by the destinationEntityId)
    }
}
Understanding Route Responses
A RouteResponse contains a boolean which indicates whether or not the RouteRequest was successfully processed. An error may occur for several reasons, such as if an invalid start or data was provided, or a route could not be found.
A requested route may involve single or multiple destinations. A RouteResponse consists of a list of Route objects, where each Route represents a trip to a specific destination. Each Route consists of a list of route segments, where each segment represents a separate segment of the route, such as a different floor inside a building, or an indoor-outdoor segment. Each segment consists of a list of route points, where each route point represents a specific location, and possibly, a corresponding instruction.
// Note: do not forget to handle null cases when you receive a
// RouteResponse from the RoutingRequestCallback.
void onRouteResponseReceived(RouteResponse routeResponse) {
    if (!routeResponse.success()) {
        RouteError routeError = routeResponse.getRouteError();
        // check or log routeError
        return;
    }

    /*
        If multiple destinations were requested, there may be multiple routes.
        Each Route represents the trip to a specific destination.
    */
    List<Route> routes = routeResponse.getRoutes();

    for (Route route : routes) {
        // Select the desired path variant: optimal, accessible, or a bypass route.
        RoutePath routePath = route.getOptimalRoute();
        if (routePath == null) {
            continue;
        }

        // All segments for this path (e.g., multiple floors, or indoor-outdoor).
        for (RoutePathSegment segment : routePath.getSegments()) {
            // Outside property, within property, or within building.
            RouteSegmentType segmentType = segment.getSegmentType();

            // Path mercator points for UI plotting.
            List<Mercator> pathPoints = segment.getPoints();

            // Iterate the instruction points along this segment.
            for (RoutePointInstruction pointInstruction : segment.getInstructions()) {
                // Instruction type, e.g., ROUTE_CONTINUE, ELEVATOR_UP, ESCALATOR_UP, ...
                InstructionType instructionType = pointInstruction.getInstructionType();

                // Localized, human-readable instruction (English by default).
                Instruction instruction = pointInstruction.getInstruction(appContext);
                String instructionText = instruction.getText();

                // Drawable resource for this instruction type.
                int drawableId = instruction.getDrawableResId();
            }
        }
    }
}
func routeResponseReceived(response: MNRouteResponse) {
    guard response.isSuccessful else {
            // routing failed
            return
    }

    /*
    If multiple destinations are requested, there may be multiple routes.
    Each route represents the trip to a specific destination.
    */
    let routes = response.routes
    //Index into routes to access a particular route
    let route = routes[0];

    //You can access individual segments of a route as follows
    let routeSegment = route.segments[1] //size checks are skipped for brevity

    // Smoothed route for UI plotting
    let smoothedRoute = routeSegment.smoothedRouteNodes

    //Get instructions
    for routeSeg in route.segments {
        for routeNode in routeSeg.routeNodes {
            if routeNode.isKeyPoint {
                // instruction will take into account localization, if supplied
                // default is english
                let instruction = routeNode.instruction

                // You can customize your own behaviour by using the instruction type
                // e.g., TURN_LEFT, TURN_RIGHT, ENTER_BUILDING, ...
                let instructionType = routeNode.instructionType

                // EntityId of the instruction's landmark (-1 if doesn't exist)
                let landmarkEntityId = routeNode.landmarkEntityId
            }
        }
    }
}
Programmatically Add Points-of-Interest
Mapsted Maps supports programmatically adding and wayfinding to your own Points of Interest (POI). You can create a Tag object which holds the necessary location data. Your custom Tag or POI can be added to the user's itinerary and/or be navigated to. You also have the ability to add multiple tags at the same time, or to delete all tags from a property.
Android: programmatic custom-POI / tag placement — placing a pin and adding it to the itinerary via the prebuilt UI — is not available as a client API in 26.7.1 (tracked for a future SDK release). To route to your own location on Android, wrap a MercatorZone in a Waypoint and add it as a destination with RouteRequest.Builder(propertyId).addDestinationWaypoint(…) (see the routing sample above).
    let zone = MNZone(propertyId: thePropertyId, buildingId: theBuildingId, floorId: theFloorId)
    let mercator = MNMercator(x: xCoordinate, y: yCoordinate, z: zCoordinate)

    // When using prebuilt UI/UX,
    // This will place a pin on the POI location and provide options for adding to itinerary or navigation
    if let mapsVC = MapstedMapUiViewController.shared as? MapstedMapUiViewController {
        let newTagName = "My Tag";
        mapsVC.addTag(tagName: newTagName, tagPos: MNPosition(zone: zone, loc: mercator))

        //Use the addTags method to add more than one tag at once.

        //Initialize and populate your tags
        let multipleTags: [MNTag] = ...

        //Add the batch at once.
        mapsVC.addTags(tags: multipleTags)

        // Use deleteAllTags to delete all tags added to a property
        let pId = 1234
        mapsVC.deleteAllTags(propertyId: pId)
    }